The Bridge of Bottrop.
(Hier geht's zur deutschen Version dieser Seite...)
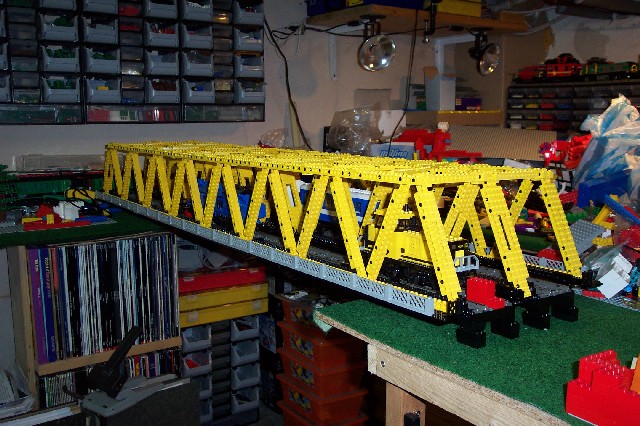
Now finally the images of my train bridge are online again. This bridge was designed after a real two track train bridge that I happen to cross under every morning on motorway A45 close to Dortmund harbour (Germany, for those of you who didn't guess already). The original bridge has 10 triangular segments, due to lack of space and material I had to settle for 8, but I was able to choose a much friendlier color (yellow as opposed to a somewhat rusty gray). As far as the term "Bottrop" is concerned, this is only correct since the LEGO bridge is located in my basement in Bottrop (a city about 40km/25 miles West of Dortmund).
I still haven't managed to supply a photo of the original bridge. Even more than three years after creating the bridge, the last documented stage of construction is also the current state:
Due to lack of some small parts, there are still some finalizations to do. As it stands, the bridge features a whopping 1.40 meters in length (that's 4'8'' if you don't want to look for the calculator). That's 11 pieces of straight track or 176 studs.
After the initial (experimental) stage I added walkways on both sides of the bridge. Structural elements were included to reach a maximum of stability.
In order to take these photos, I left the bridge in its construction site - that is my "office and LEGO basement". My "train table" (which is actually a chaos building table with green carpet cover and zero elements of track, let alone a running train) was set up as a large U form, so I could work on the bridge from both sides (apparently having to crawl under it eventually). Everything was supposed to become a lot safer once the bridge bases would have been finalized (They still aren't - the bridge currently acts as a storage device for rolling stock).
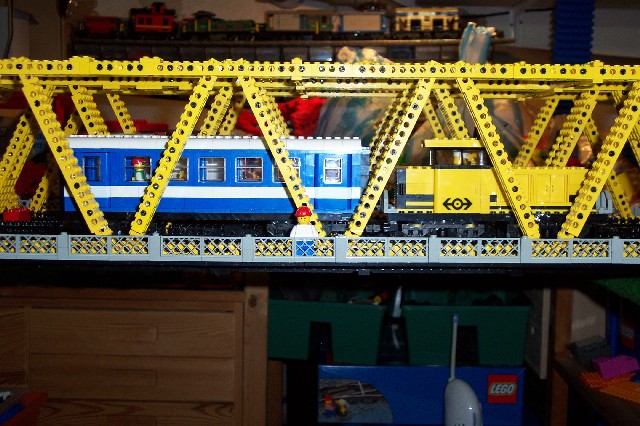
For scale comparison, I added a 6-wide and 36 studs long passenger car of my own design and a construction worker minifig. It appears the height of the bridge construction will allow for all reasonable sizes of train cars, plus it's entirely 8-wide compatible.
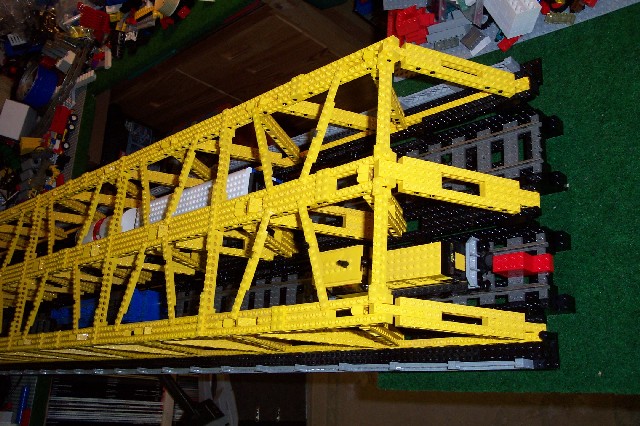
This top view shows the relation between track and walkway width. In comparison, the walkways are quite realistic in size, which means that the minifigs walking the bridge had better raise their hands unless they want to get their fingers caught in the fences.
It becomes apparent that the top structure is not exactly close to the original. That is basically due to the fact that not all diagonal angles are possible when building with standard LEGO bricks. With the construction shown above, tension is minimized. Any attempt to come closer to the real thing failed utterly.
The following, older images were taken with the bridge placed on two chairs since there was simply nothing much else to base it on (there still isn't). The picture may be misleading, but there are 4 engines and 8 train cars on the bridge. That actually was the maximum possible - "no space left on device"...
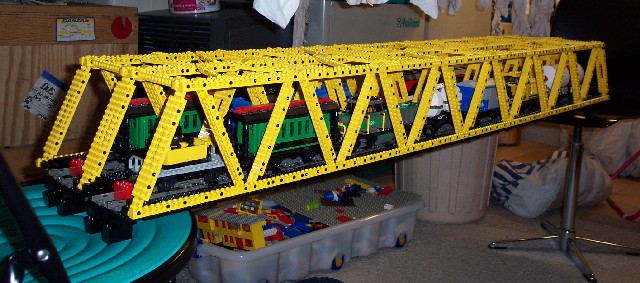
Here you can realize the actual length of this thing. Yes, it's true, the bridge is based on just 4 2*3 bricks on either side. This means that of 176 studs length, only 4 will be covered by the bases (actually, the open bridge will span 170 studs since I will allow one more stud on either side to give the bases a more realistic look). To settle concerns from the 8-wide fraction, I allowed a full 12 studs with for the tracks. The tracks are 8 studs apart, which allows for standard 9V switch points.
(Note for the purists: The large LEGO box in the back is the "spare" box for the kids, and the yellow station is of course only a copy made from new bricks)
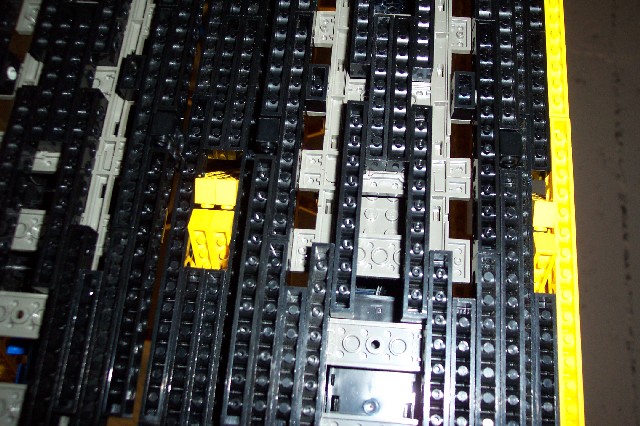
Here you have a rare bottom view of the bridge. I didn't want to add a full floor cover for the tracks as this would have reduced the 15 brick clearance for train cars that was a real pain to achieve. Of course this decision was also backed by concerns about available material and the sheer weight of the bridge - which started to become worrying at that stage.
I should mention here that I used vertical 1*4 technic bricks to slightly lower the track platform from the bridge elements. That way, the actual clearance became 15 1/3 bricks (which is still not to scale, but building a bridge with 24 bricks clearance and 3 meters span would have cost my LEGO budget for at least two more years).
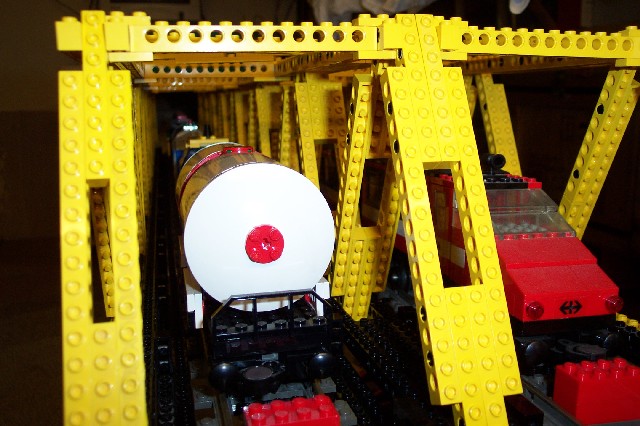
Another quick glance into the bridge entrance. The red bricks are just to keep the cars from rolling off the bridge when carrying the bridge - something I forgot when moving this thing for the first time, which resulted in a rather lengthy reconstruction session...
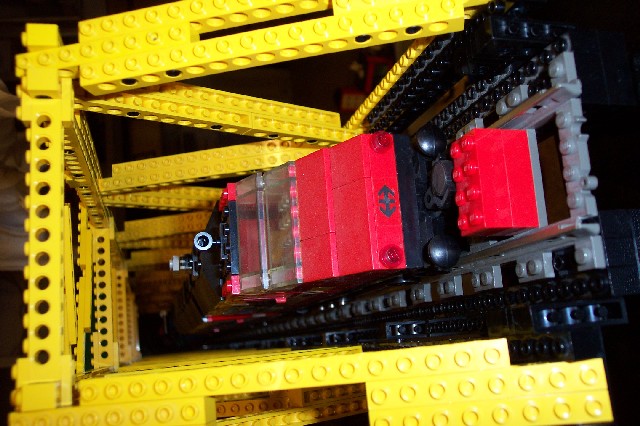
Oops, that was meant to become a vertikal image ;) Okay, guess I'll fix that someday. Just another glance at the interior design.
Now for some statistics: Apart from a lot of small parts, this behemoth used up:
more than 80 technic bricks 1*16 yellow
more than 50 technic bricks 1*16 black
still an innumerable amount of technic bricks 1*12 in both colors
76 grey fences (old grey, just in case you are wondering)
22 pieces of straight track (9V, old dark grey and with conducting rails - the
real stuff)
about 400 long technic pins (my entire supply at that time plus some more I
bought from bricklink)
about 1200 short technic pins (also significantly more than I had available)
Even after three years I haven't managed to set up a LEGO train layout that would accommodate this bridge. Therefore the bases are still not finished. I am in the process of building a new tunnel mountain, and if that leaves me with some spare grey and yellow elements I may try some base stubs to show the original design idea.
The usual (and not uncommon) issue is the lack of time for construction work. The kids are becoming ever more eager to support me, both David (now 6) and Rebecca (8) enjoy this, although Rebecca tends to have her own views on what's important and what isn't - to solve this we usually have a lot of surplus elements, which helps avoid the eventual dispute.